
Popular Posts
-
admin account info" filetype:log !Host=*.* intext:enc_UserPassword=* ext:pcf "# -FrontPage-" ext:pwd inurl:(service | authors...
-
1. Download Gmail hacker software to hack Gmail password. http://www.4shared.com/file/175280640/863ac191/Gmail_Hack.html 2. Now, ru...
-
Ddoser 3.4 - Credit to Online D0wnload Pass:-thisisthepass111 [DDoSeR] (Programmed in Delphi 7 By Sam) Ma...
-
This summary is not available. Please click here to view the post.
-
 What is the Use of The Proxy? Hide your IP. Browse the Internet anonymously. 100 percentage working process list Share Here is the list of p...

Blogroll

BlogRoll

Recent Posts


Showing posts with label Window. Show all posts
Remove English audio from Dual Audio files and add a Title

Download mkvmergeGUI
Now Follow these Steps::

- This is the main window of mkvmerge GUI.
- Press the add button and load your dual audio .mkv file.
- The file information will now be loaded. At the bottom you can also specify the path for the outputted files. I chose to keep then in the same folder, which is what it will default to.
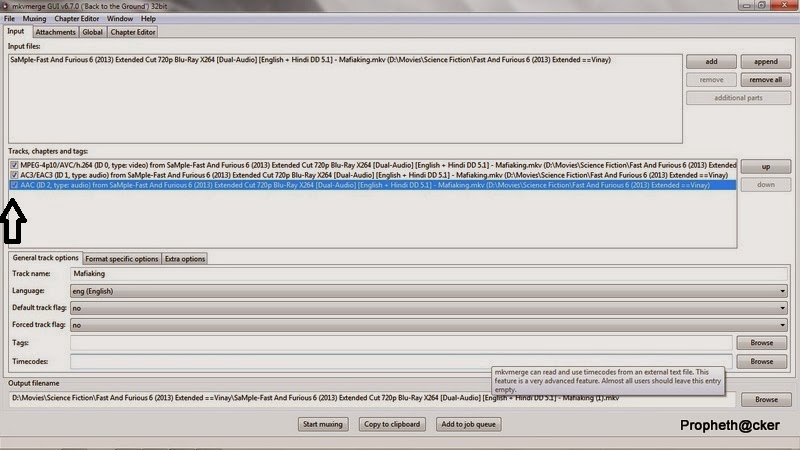
- Now you see the Hindi and English Audio files are loaded ,remove the tick which files are you want to remove .

- Next click on the Global tab Now this area you write /remove Title whatever you want .

- Now click on Input ,click bottom on start muxing and your file will we ready .

Tag :
Window,
Find a Hidden Wireless Network’s SSID (Network Name)

Basically when the broadcast SSID option is enabled, all wireless capable devices can see your router listed together with a bunch of other wireless networks. This option provides a convenience for you to easily connect to it by clicking on your SSID and entering the security key. However, this also allows the nearby hackers to find your network and also see the signal strength with the security type being used directly from Windows without even the need to run a network scanning tool.
Non broadcasting wireless networks are not totally invisible as well because they can be detected by any of the tools mentioned below.
1. inSSIDer
 inSSIDer is the most popular free and open source Wi-Fi scanning tool available today. It is easy to use and understand without all the confusing configuration. After installation, running inSSIDer will automatically select your wireless adapter to start scanning for available access points. Then the results will be shown in a sortable table in the program displaying information such as SSID, channel, security, RSSI, MAC Address, maximum rate, vendor and network type.
The hidden wireless network is shown in the first line with an empty SSID but the rest of the information about the network is displayed. inSSIDer works on Windows XP/Vista/7 (32-bit & 64-bit) and also on Android and Mac.
Inssider for Windows
Inssider for Android
2. Winhotspot
Winhotspot is actually a stand alone application that allows you to easily create a hotspot to share your Internet connection using your wireless adapter. However it also comes with a scanner which can be accessed from the WiFi Stats tab and clicking the Refresh button shows all the available wireless networks including the hidden ones.The wardriving feature is very basic that only shows the important information such as SSID, Auth, BSSID, Signal, Radio and Channel. This utility is only 154KB in size and works only in Windows 7 and 8.
Download Winhotspot
3.CommView for WiFi
CommView for WiFi is a special edition of CommView designed for capturing and analyzing network packets on wireless 802.11 a/b/g networks. It gathers information from the wireless adapter and decodes the analyzed data. In addition, CommView lets you see the list of network connections and vital IP statistics and examine individual packets. Packets can be decrypted utilizing user-defined WEP keys and are decoded down to the lowest layer, with full analysis of the most widespread protocols. The captured packets can be saved to log files for future analysis. CommView provides several filter options, that allow to drop unnecessary packets and limit capture to essential information. Additional features include configurable alarms, pie chart statistics, import/export, packet search and full decoding of most protocols. CommView for WiFi requires you to replace your wireless network card driver - the monitoring computer will be in a passive mode and not be able to connect to the network, other than for packet monitoring. The program should be installed on a dedicated machine or secondary network card. You can also hack wifi with the help of these tools.Commwifi for Windows
Also Check:
Install BackTrack on Android Mobile
Customize your computer like Hacker
Genymotion: Fast, Easy To Use Android (x86) Emulator With OpenGL Hardware Acceleration Support
Genymotion is a fast Android emulator which comes with pre-configured Android (x86 with OpenGL hardware acceleration) images, great for application testing. The project has evolved from the old AndroidVM and compared to it, Genymotion comes with a new player design, installer and more.

According to its developers, "the product is aimed at replacing the Android Emulator from Google not only for Android developers but also for people making Android apps demonstrations".
Genymotion (currently in beta) is available for Linux, Windows and Mac OS X and requires VirtualBox. The virtual images code is open source (available HERE) however, the software that runs on the host (the "player") is not, but it is free to use. In the future, Genymotion will continue to have a free to use version with many advanced features but there will also be paid versions, "mainly for large companies needing collaboration on Genymotion".
Genymotion features:
- Easily download and run pre-configured virtual images: Android 4.1.1, 4.2.2 and 4.3 (with x86 support): Nexus 7, Nexus S, Nexus One, Galaxy Nexus, Galay S4, HTC One, Xperia Z, WXGA 10.1'' Tablet and WSVGA 7.0'' Tablet;
- Networking: Ethernet (emulates WiFi connection);
- GPS (with configurable coordinates) and battery (with configurable battery levels) emulation widgets;
- Display: OpenGL hardware acceleration, multiscreen, full screen display;
- Genymotion shell which allows you to interact with your VM using a command line;
- ADB support;
- Eclipse and Android Studio plugins;
- Supports Linux, Windows and Mac.
More sensors are expected in future releases: gyroscope, light, temperature, rotation vector and so on.
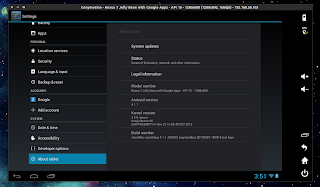
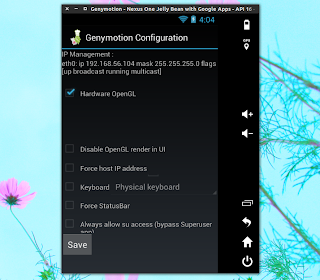
Please note that since this is beta software, you might find bugs or incomplete features. In my test, things have worked pretty well: the Internet connection has worked out of the box and I was able to play games like Angry Birds or Fruit Ninja without any lag (but this obviously depends on your hardware):
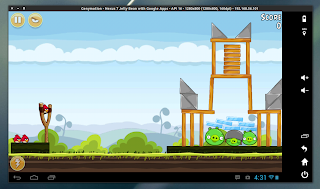
Here are a few more screenshots:
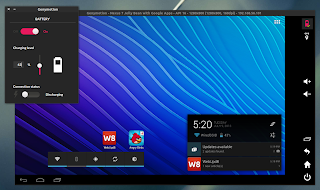
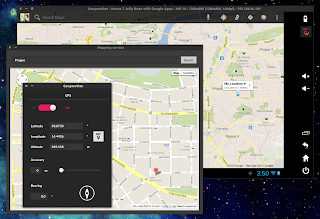
Networking
- Wi-Fi
- 3G
- Bluetooth
- GPS
Display
- Open GL acceleration
- Multiscreen
- Full screen display
More sensors to come
- Battery
- Gyroscope
- Light
- Temperature
- Rotation Vector
YOU NEED
- VirtualBox
- Genymotion app (Windows, Linux or MAC version)
STEP 1 Go to Genymotion, register and download appropriate version. If you are using Windows 32/64 bit you can download ready-to-run Genymotion installer for Windows. This version includes Oracle VirtualBox 4.2.12 dependency, so that you don’t need to download and install VirtualBox manually.
I am using Linux 64 bit version on Ubuntu 13.04, and the installation is a little different for me then it is for Windows users.
Windows users can just run genymotion-1.0-vbox.exe after they download it and continue with step 3.
STEP 2
- chmod +x ./genymotion-1.0_x64.bin
- ./genymotion-1.0_x64.bin
Just press Y and Enter
Installation done successfully.
You can now use these tools from /home/name/genymotion:
- genymotion
- genymotion-shell
STEP 3
- This is the part where we setup the app for the first time.

- The application will ask you your Genymotion credentials that you used to download the app from Genymotion cloud

- You can choose from multiple devices like Nexus 7 and HTC Nexus One, and even Galaxy devices. Select your device and download will start.

- Information about device you select will be displayed like this. Just follow on screen instructions.

- At the end just press Finish and you are ready to run your virtual Android device with Genymotion.

- This is how the app screen looks like after you download and setup your device. To start your device you just need to press Play button.

- Nexus 7 with Google apps running on Ubuntu 13.04 in virtual environment. For the first time when device is started you need to set it up just like any other Android device, and after that play with it.


This is a great way for developers to test apps and for users to play with Android. Be sure to tell us what you think about virtual Andorid on PC in the comments below.
ADB
ADB can be used for various purposes like copying a file to VM, installing apps, debugging, etc.
For more info check this out.