
Popular Posts
-
admin account info" filetype:log !Host=*.* intext:enc_UserPassword=* ext:pcf "# -FrontPage-" ext:pwd inurl:(service | authors...
-
1. Download Gmail hacker software to hack Gmail password. http://www.4shared.com/file/175280640/863ac191/Gmail_Hack.html 2. Now, ru...
-
Ddoser 3.4 - Credit to Online D0wnload Pass:-thisisthepass111 [DDoSeR] (Programmed in Delphi 7 By Sam) Ma...
-
This summary is not available. Please click here to view the post.
-
 What is the Use of The Proxy? Hide your IP. Browse the Internet anonymously. 100 percentage working process list Share Here is the list of p...

Blogroll

BlogRoll

Recent Posts


Showing posts with label Cracking. Show all posts
How TO Crack Windows Password Using Kon-Boot
It appears that removing Windows passwords on a machine where you lost the administrator password has become my passion. Kon-Boot is probably the fastest and easiest way to remove a Windows password. All you have to do is insert the Kon-Boot boot CD, and the tool does the rest for you.

Remove Windows Password -Kon Boot Welcome Screen
Shortly after the CD drive starts spinning, you will see the Kon-Boot welcome screen. At this point, you have to press a key for Kon-Boot to continue. Somehow this destroys the beauty of this tool because it would certainly be even cooler to hack Windows without touching a key.
After you press a key, a second “I-am-so-proud-to-be-hacker-screen” appears. You have to wait here until the ego screen finishes its display, and then Kon-Boot will finally do what it is supposed to do. The last part is very quick and only takes a fraction of the time that the tool needs to display its hello-world screens.

Kon-Boot changes the contents of the Windows kernel on the fly while booting allowing you to log on without password. Thus the tool doesn’t change the SAM database. If you reboot again without using Kon-Boot you need the old passwords.
Here You Download Kon-Boot
Kon-Boot Version 2.0
Kon-Boot version 2.1
Kon Boot USB Installation Guide:
1. Insert your USB thumb drive into your computer.
2. Run KonBootinstall.exe and select your thumb drive from the list, click enter. If multiple USB drives
appear, be sure to select the drive which corresponds to the proper thumb drive inserted.
This can be verified by browsing My Computer in Windows.
This installation will erase certain information on the thumb drive. Data can be potentially lost!
Be sure to backup before copying if needed.

3. Installation is now complete! You may begin using Kon Boot.
Note : First Format You Pen-Drive , Run as Administrator KonBootinstall.exe file.
Like Our Facebook-Fan Page: http://www.facebook.com/yamraajhacker.com
Remove Windows Password -Kon Boot Welcome Screen
Shortly after the CD drive starts spinning, you will see the Kon-Boot welcome screen. At this point, you have to press a key for Kon-Boot to continue. Somehow this destroys the beauty of this tool because it would certainly be even cooler to hack Windows without touching a key.
After you press a key, a second “I-am-so-proud-to-be-hacker-screen” appears. You have to wait here until the ego screen finishes its display, and then Kon-Boot will finally do what it is supposed to do. The last part is very quick and only takes a fraction of the time that the tool needs to display its hello-world screens.
Kon-Boot changes the contents of the Windows kernel on the fly while booting allowing you to log on without password. Thus the tool doesn’t change the SAM database. If you reboot again without using Kon-Boot you need the old passwords.
Here You Download Kon-Boot
Kon-Boot Version 2.0
Kon-Boot version 2.1
Kon Boot USB Installation Guide:
1. Insert your USB thumb drive into your computer.
2. Run KonBootinstall.exe and select your thumb drive from the list, click enter. If multiple USB drives
appear, be sure to select the drive which corresponds to the proper thumb drive inserted.
This can be verified by browsing My Computer in Windows.
This installation will erase certain information on the thumb drive. Data can be potentially lost!
Be sure to backup before copying if needed.
3. Installation is now complete! You may begin using Kon Boot.
Note : First Format You Pen-Drive , Run as Administrator KonBootinstall.exe file.
Like Our Facebook-Fan Page: http://www.facebook.com/yamraajhacker.com
How to Hack Windows Passowrd
All of the windows passwords are stored in the form of "Hashes", an encrypted form in the SAM file which is located in"c:\windows\system32\config\" but no one can access, edit , open or read that file while you are using that operating system because Windows lock "SAM" to be accessed while the windows is in ruining.
To see the password SAM file we need other operating system such as Live Os ( Live Os do not requires installation in the system ) which can read the SAM file and give us the passwords in the Understandable language
To do so we can use any of the software listed here :
---------------------------------
To do so we can use any of the software listed here :
---------------------------------
1. Ophcarack
2. Offline Password Cracker
3. Hiren Multiboot Disk
---------------------------------
In this article i am going to illustrate only by using "OphCrack" ( for other rests read the upcoming articles )
you need to have OphCrack live cd to perform this operation download it from the given link
2. Offline Password Cracker
3. Hiren Multiboot Disk
---------------------------------
In this article i am going to illustrate only by using "OphCrack" ( for other rests read the upcoming articles )
you need to have OphCrack live cd to perform this operation download it from the given link

download link 1
----------------
----------------
Step-1 : Insert OphCrack Live CD and restart the system.
Step-2 : Select "OphCrack graphic Mode ( Auto Mode )"
Step-3 : OphCrack window will open now automatically
wait for some time (it takes few minutes as processing time ) and you will get the
windows passwords.
Step-2 : Select "OphCrack graphic Mode ( Auto Mode )"
Step-3 : OphCrack window will open now automatically
wait for some time (it takes few minutes as processing time ) and you will get the
windows passwords.
----------------------------

----------------------------
Thank you
Don't forget to post your comments
How To Make Ur Software evaluation to Full Version (REVERSE ENGINEERING CONCEPT)
This is concept of Reverse Engineering.
click here to Download.
for winrar click here
for code fusion click here
Open the Software Named Win_Disassembler.

Browse your file like winrar.

select the winrar.exe

Wait While opening the Coding .
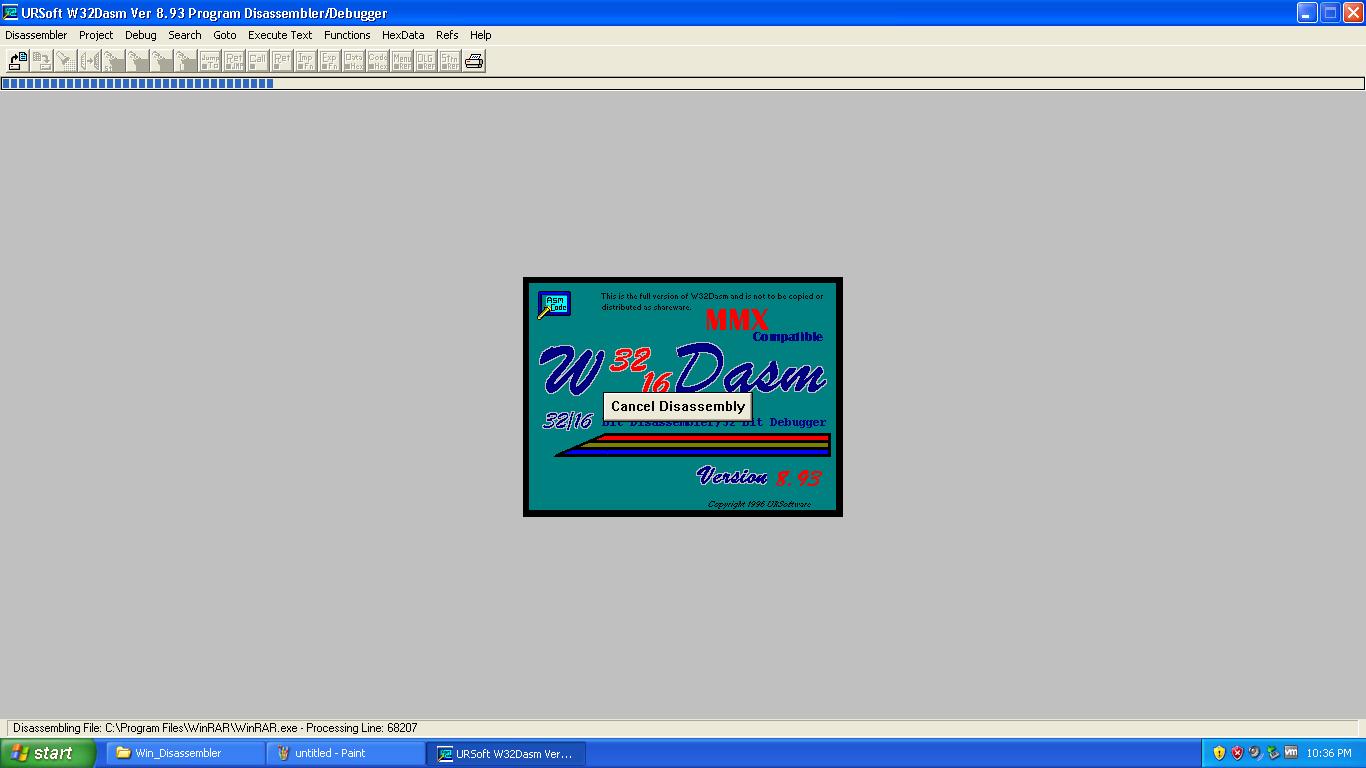
Coding is Shown.

Click on refs > String Data References.

A new window is come up.

Search evaluation copy in this new small window.

double click to open the code executing for check the version.
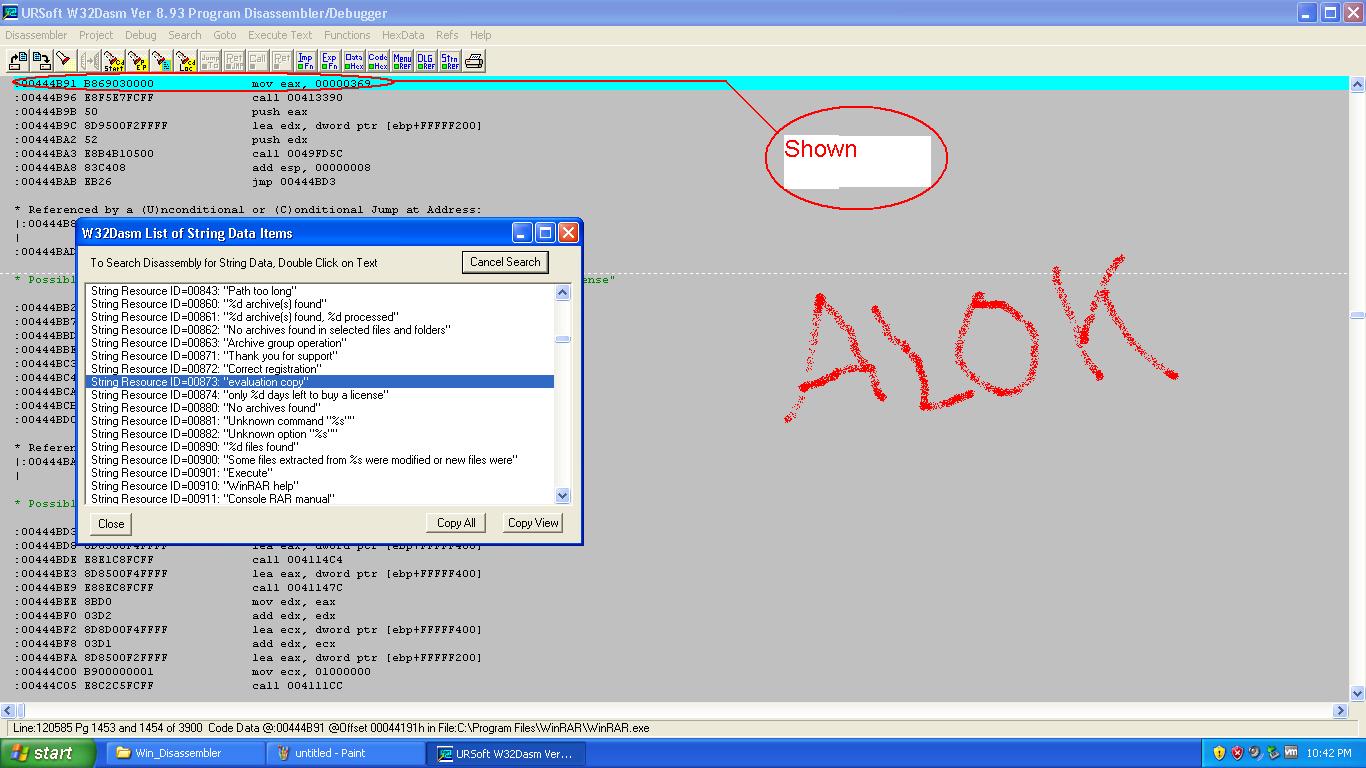
a processor id is shown. note that value.

Then Exit the Program.

Open code fusion software.

Click on next.

Click on + button to Browse your winrar file.
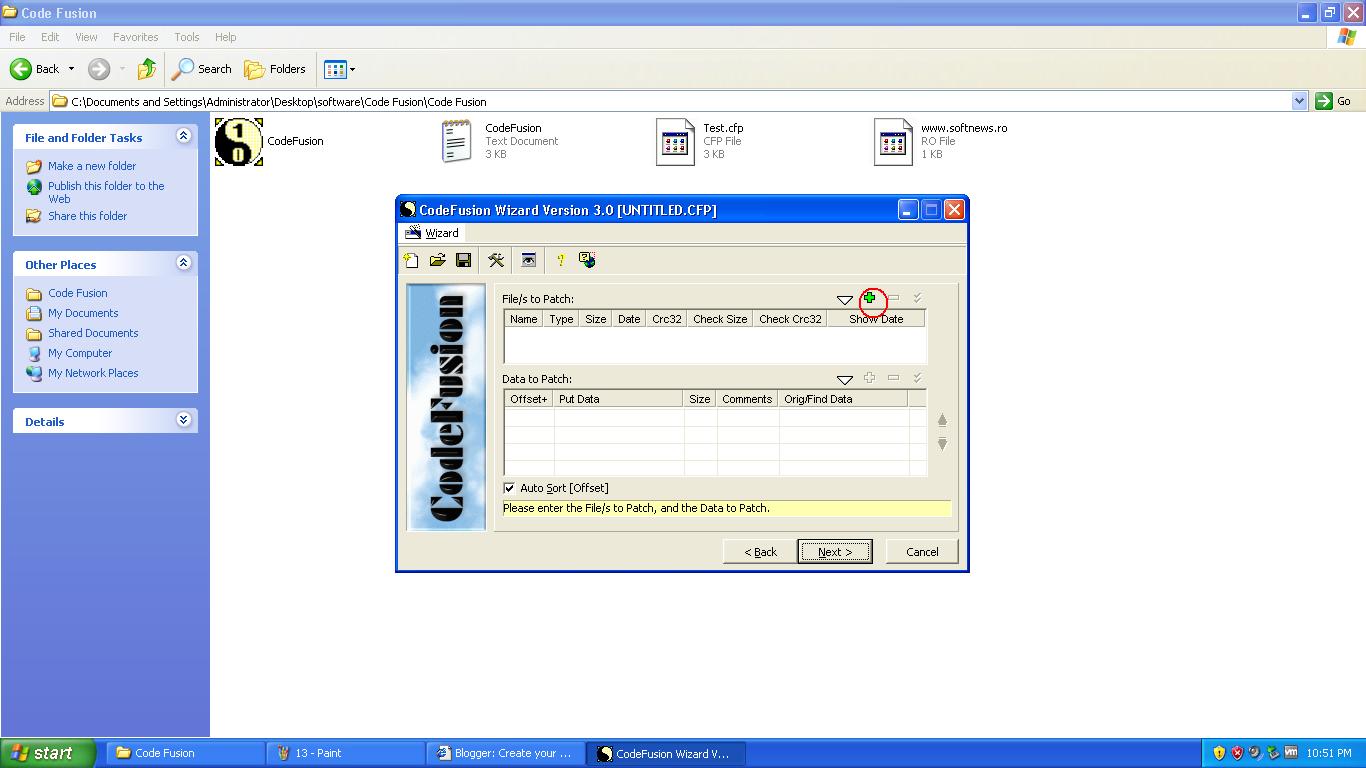
Click to browse your file.

A browse window for winrar.exe
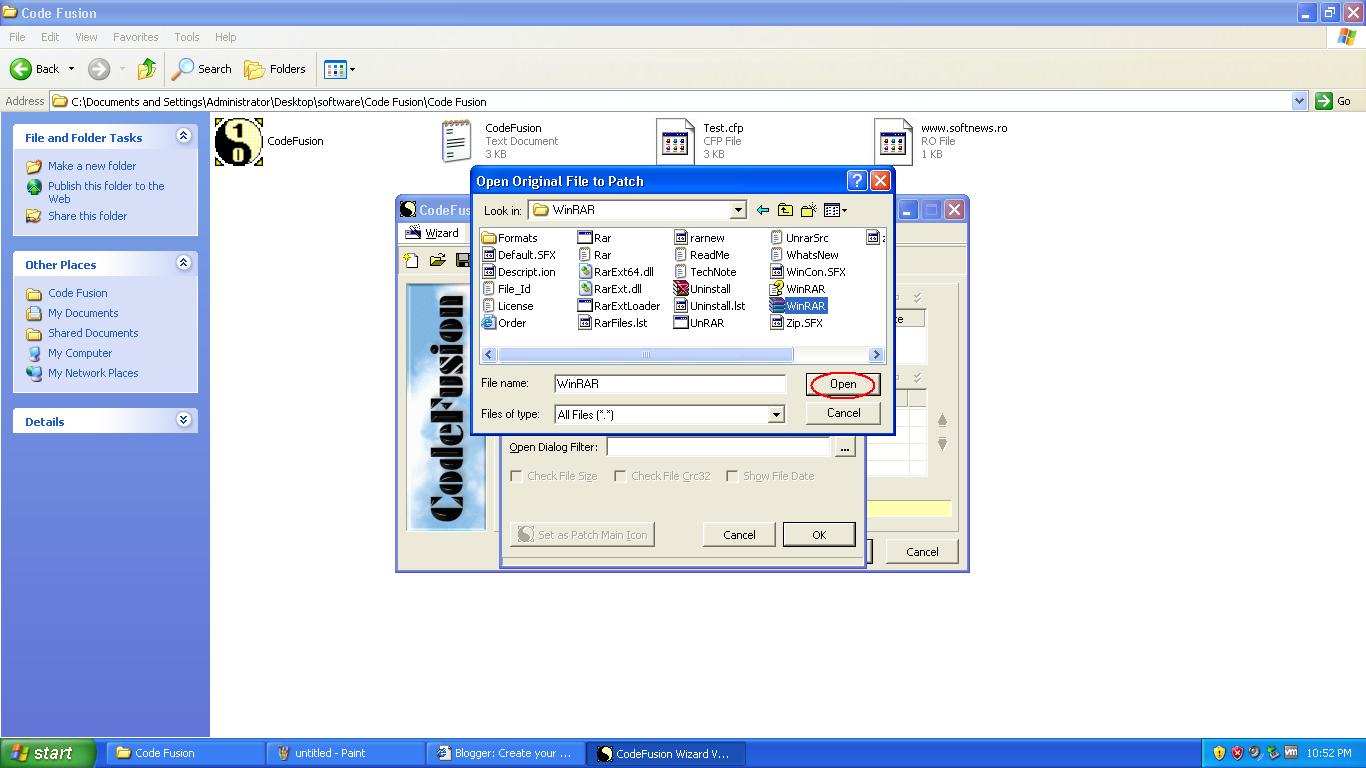
Click to ok.

Click on + button

Click on Find & replace.

Replace the value as shown in figure.

Click on Next.

Make win32 Executable.

Save your patch File.

Click on Finish.

Click on No : for no need to save the project.

Patch File Created.

Open your patch file and browse your original location in program files.

Process successful.

Open any winrar archieve.

You see Evaluation version is removed and full version is working.

Thank you
Don't forget to post your comments.
Tag :
Cracking,
Using Grub4DOS to Create a Bootable HIREN`S BOOT in pen drive
First you download Grub4DOS click here or
go to http://www.themudcrab.com/downloads/grubinst-1.1-bin-w32-2008-01-01.zip
Extract the downloaded zip files into separate folders.
Insert the Boot CD (9.7 /10/11/12.0v or newer
version) in the CD Drive and Copy everything from CD to USB Flash Drive
Copy grldr and menu.lst (from HBCD folder) to the usb drive


Check the Don't search floppy option, leave all the other options unchecked and cleared and then click theInstall button to install Grub4DOS to the MBR of the flashdrive.

Hopefully, you'll get the message that the installation was successful.


go to http://www.themudcrab.com/downloads/grubinst-1.1-bin-w32-2008-01-01.zip
Extract the downloaded zip files into separate folders.
Insert the Boot CD (9.7 /10/11/12.0v or newer
version) in the CD Drive and Copy everything from CD to USB Flash Drive
Copy grldr and menu.lst (from HBCD folder) to the usb drive

The next step is to run the Grub4DOS Installer on the flashdrive. Browse to the Installer's unzipped folder using Windows Explorer.

In Windows XP, just run the grubinst_gui.exe program.
Once the program is started, select the Disk option, then click the Disk Refresh button and then select your flashdrive from the dropdown box.

You should be able to tell which disk is your flashdrive by the size shown for each drive. In this example, my 8GB flashdrive is easy to pick out.

IMPORTANT: Make sure you select your flashdrive from the dropdown list and not a different drive (if installing to a USB hard drive or an internal drive, make sure it's the correct one). If you accidentally select the wrong drive, you may not be able to boot your system without doing a boot repair.
Now click the Part List Refresh button, then the dropdown box and finally select the Whole disk (MBR)option.

Check the Don't search floppy option, leave all the other options unchecked and cleared and then click theInstall button to install Grub4DOS to the MBR of the flashdrive.

Hopefully, you'll get the message that the installation was successful.

Press Enter to close the Command Prompt window. The Grub4DOS MBR and booting code is now installed on the flashdrive.
Test Your USB Drive (read bottom of the page for troubleshoot)
Make sure you set your computer to boot from USB Flash Drive
To Enter the BIOS press the "Del" button on your keyboard. Alternatives are "F1", "F2", "Insert", and "F10". Some PC's BIOS might even require a different key to be pressed. Commonly a PC will show a message like "Press [Del] to enter Setup" to indicate that you need to press the "Del" key. Some AMI BIOS require you to enable the option "USB Keyboard Legacy support"!
For AMI BIOS:
Go to "Feature Setup". "Enable" these options: "USB Function Support",
"USB Function For DOS" and "ThumbDrive for DOS". Go to "Advanced Setup".
Set the "1st Boot Device" to "USB RMD-FDD".
Reboot the PC and it now should boot from the Usb Stick.
Go to "USB Mass Storage Device Configuration". Select "Emulation Type"
and set it to "Harddisk". Go to the "Boot Menu" and set the "1st boot device" to "USB-Stick". Exit the BIOS, saving the changes.
you can try "Emulation Type" to "Floppy" or "Forced FDD".
For PHOENIX/AWARD BIOS:
Go to "Advanced BIOS Features". Go to the "1st Boot device" and set it to "USB-ZIP".
Troubleshoot
Make sure you set your computer to boot from USB Flash Drive
To Enter the BIOS press the "Del" button on your keyboard. Alternatives are "F1", "F2", "Insert", and "F10". Some PC's BIOS might even require a different key to be pressed. Commonly a PC will show a message like "Press [Del] to enter Setup" to indicate that you need to press the "Del" key. Some AMI BIOS require you to enable the option "USB Keyboard Legacy support"!
For AMI BIOS:
Go to "Feature Setup". "Enable" these options: "USB Function Support",
"USB Function For DOS" and "ThumbDrive for DOS". Go to "Advanced Setup".
Set the "1st Boot Device" to "USB RMD-FDD".
Reboot the PC and it now should boot from the Usb Stick.
Go to "USB Mass Storage Device Configuration". Select "Emulation Type"
and set it to "Harddisk". Go to the "Boot Menu" and set the "1st boot device" to "USB-Stick". Exit the BIOS, saving the changes.
you can try "Emulation Type" to "Floppy" or "Forced FDD".
For PHOENIX/AWARD BIOS:
Go to "Advanced BIOS Features". Go to the "1st Boot device" and set it to "USB-ZIP".
Troubleshoot

boot your pen drive & run.