Labels

Popular Posts

Powered by Blogger.

Blogroll

Hacking Cracking Tricks

Recent Comments

BlogRoll

http://www.prcheckingtool.com

Recent Posts

Bookmark  and Share Technology & Science Blogs - BlogCatalog Blog Directory Submit your website to 20 Search Engines - FREE with ineedhits! http://www.prcheckingtool.com Text Back Links Exchange PageHeat Website Value LocalSubmit.com : search engine submissions and website promotion with free advice Internet Blogs Hacking Cracking Tricks

Showing posts with label Android. Show all posts

Easy Android ROMs Customization Through Xposed Framework

Besides the usual customization we can do with Android launchers and Android widgets, we also love to try new features that available on custom ROMs. But custom ROMs can be unstable and buggy sometimes and the process to flash over to a new ROM is very time-consuming, especially if you need to restore your backup and app settings.
Through Xposed Framework, by just downloading and installing a ready-made module you can make modification (modules) to any element of the OS or the app itself without the need of flashing a new ROM. For example, if you ever need to skip YouTube ads on your android, download the module for that, install, enable and reboot your device for the effect to take place immediately.
Xposed Framework is getting popular among Android enthusiasts thanks to its easy-to-use interface and added safety which helps you recover easily if it end up soft-bricking your Android device. Also, since Xposed Framework needs to access the Android core system, you need a rooted device for this app to work.

Installing Xposed Framework

Make sure your device is running on Android 4.0.3 or later and you have already enabledUnknown Sources in Settings > Security. You may start by downloading the Xposed Framework app installer here and then install it.
Once installed, open the app and tap on Framework.
Tap on Install/Update and you will be prompted with a superuser message, grant access to it to begin installing. After that, tap on Reboot to restart your device and you can then begin downloading modules.

Download Modules

Now you are ready to download modules and within the app, there is a download section for you to pick out which features you want on your device. For example, YouTube AdAway, BootManager, Xprivacy. Head over to XDA forums to look for more Xposed Modules.
Choose the module you would like to download, tap on it and then tap on Download. Next, install it.
When you receive the notification to activate the module, in the drop-down notification bar, tick it to enable it.
Reboot your device afterwards for the changes to take effect.

Bootloop? Disable Xposed Framework

If somehow you end up with a bootloop on your Android device, there is a zip file that you can flash to disable Xposed Framework. This zip file is automatically available after you install Xposed Framework on your device and it is located in your device sdcard folder.
In your Android Recovery, locate "Xposed-Disabler-Recovery.zip", flash it to disable Xposed Framework.

Conclusion

By itself Xposed Framework is just a framework and no files on the device itself are modifiedsince you are using modules to customize your Android device and these modules can be disabled easily. If you want to stay on a stock rom and have custom ROMs functionality, Xposed Framework is your answer.

Must-Have Xposed Modules For Android


Xposed Framework enables all kinds of customization allowing Android users to enhance the look or add features to their device, without touching the original system files or APKs. It uses modules that run on memory. Therefore, any changes made can be removed easily by simply disabling the modules and rebooting. No more flashing ROMs just to get a new feature to work.

There are top 10 must  have Xposed modules are here:

GravityBox. Targeted for Android version 4.1+, this is an all-in-one module that provides a large range of mods.
Wanam Kit. Customize your Android 4.4 with features for status bars, sound, lock screen, system, phone, security and more.
BootManager. Choose the app you want to prevent running upon system startup using BootManager. This will help to reduce slow booting times.
XuiMod. Compilations of features ported from other ROMs packed into one mod.
XPrivacy. Restrict access to certain app permissions to prevent leaking of privacy sensitive data.
Android Phone Vibrator. This will allow your Android phone to vibrate whenever a call is connected or disconnected upon calling.
XBlast Tools. Xblast Tools has a huge range of features for you to customize your Android device in any way that you want. The packed user interface lets users apply changes quickly.
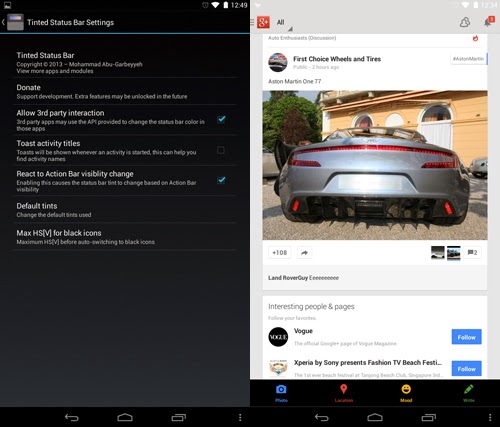
Tinted Status Bar. Change status bar color to match the current active app. Can be edited manually too.
Youtube AdAway. Remove YouTube ads from the official Android YouTube app.
Maximize Widgets on Lockscreen. Expand lockscreen widgets when device unlocked for quick viewing of notifications.


You can download more modules at   Xpose Framework Website 


Tag : ,

How to record a phone call on your Android smartphone

 How to record a phone call on your Android smartphone

  • Can you believe you’ve just been treated this way by a customer service rep? Did a crime suspect just admit to committing the deed? Did you have the chance to talk to your favorite star? Obviously there is more than one reason why you might want to record a call. Here’s how to save a phone conversation on your Android smartphone.
    Android Call Recording App allows user to record conversation of an ongoing-incoming call.
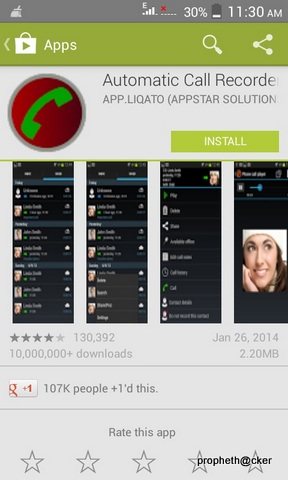
    There are many apps to fulfill this purpose, but the best one we can recommend is Automatic Call Recorder, you can stick with the free version which has everything you need, the pro version isn’t really worth it.


    Automatic Call Recorder

    Record any phone call you want and choose which calls you want to save.


  • When in the app, head straight to the settings (first you’ll be presented with the new app features), where you must enable various setting’s options.
  • Ensure that you have ticked the box for Record calls.
  • Next, under Media settings, change the File Type to AMR, which is in fact better for playback on a third-party app at a later point in time.
  • Set the default Audio Source to Mic if it isn’t already.
  • Close the app. 
  • Open up the phone app and call someone, you can try calling a toll-free number instead of harassing a friend while testing this app out.
  • When the call is underway, you will see the red recording dot at the top left corner of your status bar. Swipe down the notifications and you’ll see that the call is being recorded.
  Once you hang up, there will be a notification telling you that you have one recorded message. Tap on it and it brings you to the recording data where you have the option to play, delete, share, save, add notes, check contact history, contact details as well as call back. The length of time is also posted up top, including the files size.

If you encounter any recording issues or wish to improve voice quality, try recording from a different audio source, or use auto-on speaker mode.
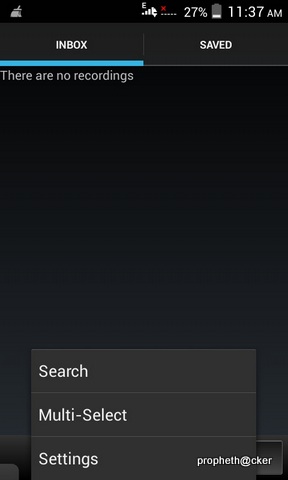
Recorded calls are stored in the Inbox. You can change the destination recordings folder to an external SD card as well. You can set the size of the inbox. The number of saved calls is limited only by your device memory. If you decide that a conversation is important, save it and it will be stored in the Saved Calls folder. If not, old recordings will automatically be deleted when new calls fill up the inbox.

https://play.google.com/store/apps/details?id=com.appstar.callrecorder


Tag : ,

WLAN Direct Wi-Fi in Android :Play Multiplayer Games & Data Transfer upto 20MB/s

Wi-Fi Direct is an emerging wireless standard that allows you to create a create a connection between any two devices without going through a wireless router. Want to create a Wi-Fi hotspot, connect your computer or smartphone to your printer or stream movies from your tablet to your television? There is a good chance that Wi-Fi Direct is doing the heavy lifting.


How Wi-Fi Direct Works

Imagine that you are in your house or apartment. In this day and age, there is a pretty good chance that you have a Wi-Fi router that acts as your de facto home network. It is the hub of all things connected in your home. The router is the hub, the trunk of the tree with many branches. Those branches can’t really interact with each other except through by going back through the router.

That router hub is essentially the gateway to connectivity, called a wireless access point (WAP). What Wi-Fi Direct does is cut out the trunk of the network. Instead of going back to the hub, two devices using Wi-Fi Direct are given limited wireless access points. The setup for Wireless Direct is much simpler than adding a device to a traditional Wi-Fi network, often taking only the tap of a button or entering a personal identification number or code that is entered once. In this way, Wi-Fi Direct works much like Bluetooth, just with a longer range and more stability.
For instance, if I want to hook my PC, laptop, tablet or smartphone to a Wi-Fi Direct-enabled printer, I just have to click a button once the printer, tell it to find a device (my PC, for instance) and tell it to connect. On the computer, a dialog box will pop up in the printer application and I can enable the connection.
Wi-Fi Direct does this by creating a connection between two devices using a protocol called Wi-Fi Protected Setup (WPS). The Wi-Fi Protected Setup standard is what makes connecting the devices much simpler than adding devices to a traditional wireless access point. WPS was originally created for users to easily set up security for their Wi-Fi networks without being wireless security wizards. Additional protocols have been created to make Wi-Fi Direct more useful such as Universal Plug And Play, Zero Configuration Networking and Devices Profile for Web Services.

What Wi-Fi Direct does is use software within those devices that can perform a variety of functions both simple and complex (a wireless mouse being simple, a smartphone that can share its hotspot, share streaming media and files being complex). This is done through a concept called “software access points” (Soft AP). The Soft AP makes it possible for a device to act both as the both the access point that the Wi-Fi comes from and the client that uses it.


How can you use it in your Android 

Wirelessly Transfer data upto 20mbps 


ShareIT  (Play Store )

Description
The world’s fastest way to share photos, apps and more across devices…without network charges or Wi-Fi connection. Lenovo SHAREit eliminates the need for cables to wirelessly transfer information rapidly between devices – either with friends, or to take your personal content on the go.
• Share everything with other devices – pictures, videos, music files, documents, contacts…even apps!
• Devices with SHAREit can automatically find each other when in range.
• Transfer HUGE files and videos in seconds …up to 40x faster than Bluetooth®.
• Share without the need for Bluetooth, phone network or active Wi-Fi network…you don’t pay a cent for network charges. Devices wirelessly connect directly.
• Even the app itself can be shared to other devices wirelessly, and rapid sharing can begin immediately.
• Supports group sharing – up to 5 devices simultaneously. Instantly share a party video, music album or photo library to up to five friends at once!
"You know na bluetooth is a thing that hundred years old."


Play Multiplayer Games in Android 

I suggest you some best multiplayer games for android ,you can play with your friends at everywhere. 

Asphalt 8:Airborne 

[Price: Free]
We’ll start our list with Asphalt 8: Airborne because it is a pretty competent multiplayer game. Much like the main story, multiplayer involves racing people online in real time with up to 8 participants. There are also ghost challenges where friends can challenge your best time on a track and race a ghost of you without you being required to be there. It’s free with in app purchases so it costs nothing to try and many people enjoy it. 
https://play.google.com/store/apps/details?id=com.gameloft.android.ANMP.GloftA8HM 


Badland  

[Price: $3.99]
BADLAND is a unique game with amazing design and simple game play. It made our runner up for best designed game of 2013 and for good reason. It’s simply a good looking game. In the multiplayer mode in BADLAND, it’s much the same as the game play with the difference being the multiplayer takes place all on the same device. So it isn’t online multiplayer. There are 21 multiplayer levels and the developers have said more will be added. It’s free to demo but to get the full game you have to pay  
https://play.google.com/store/apps/details?id=com.frogmind.badland


Modern Combat :Zero Hour

[Price: $6.99]
Modern Combat 4 is really only a place holder here until Modern Combat 5 comes out, but if you’re really itching for a good multiplayer shooter, Modern Combat 4 is a really great game to go with. It was one of the first FPS titles to feature console level graphics and online multiplayer and they’ve done it right since it’s still one of the best. If you’ve ever played multiplayer on an FPS title before, you know what to expect in the multiplayer here. It’s a little pricy at $6.99 but it’s still a good game 


https://play.google.com/store/apps/details?id=com.gameloft.android.ANMP.GloftM4HM


SHADOWGUN : Deadzone

[Price: Free]
SHADOWGUN: DeadZone is another first person shooter from the makers of Dead Trigger and Dead Trigger 2. The multiplayer in this game is astounding as you can gun it out with up to 12 players total in various online deathmatches. The developers have been really good with fixing bugs and adding new content so there is frequently new things to try out. Did we mention it’s also free? If you’re looking for a cheap FPS, this is the one to go with. 

https://play.google.com/store/apps/details?id=com.madfingergames.deadzone


Tag : ,

- Copyright © .Hacking Cracking Tricks And Tutorials, Paid Scripts, Latest Exploits, 0Day Vulnerability, - Skyblue - Powered by Blogger - Designed by Johanes Djogan -